
235 lines
9.1 KiB
Markdown
Executable File
235 lines
9.1 KiB
Markdown
Executable File
---
|
|
comments: true
|
|
description: Learn how to organize and manage projects in Ultralytics Platform for efficient model development.
|
|
keywords: Ultralytics Platform, projects, model management, experiment tracking, YOLO
|
|
---
|
|
|
|
# Projects
|
|
|
|
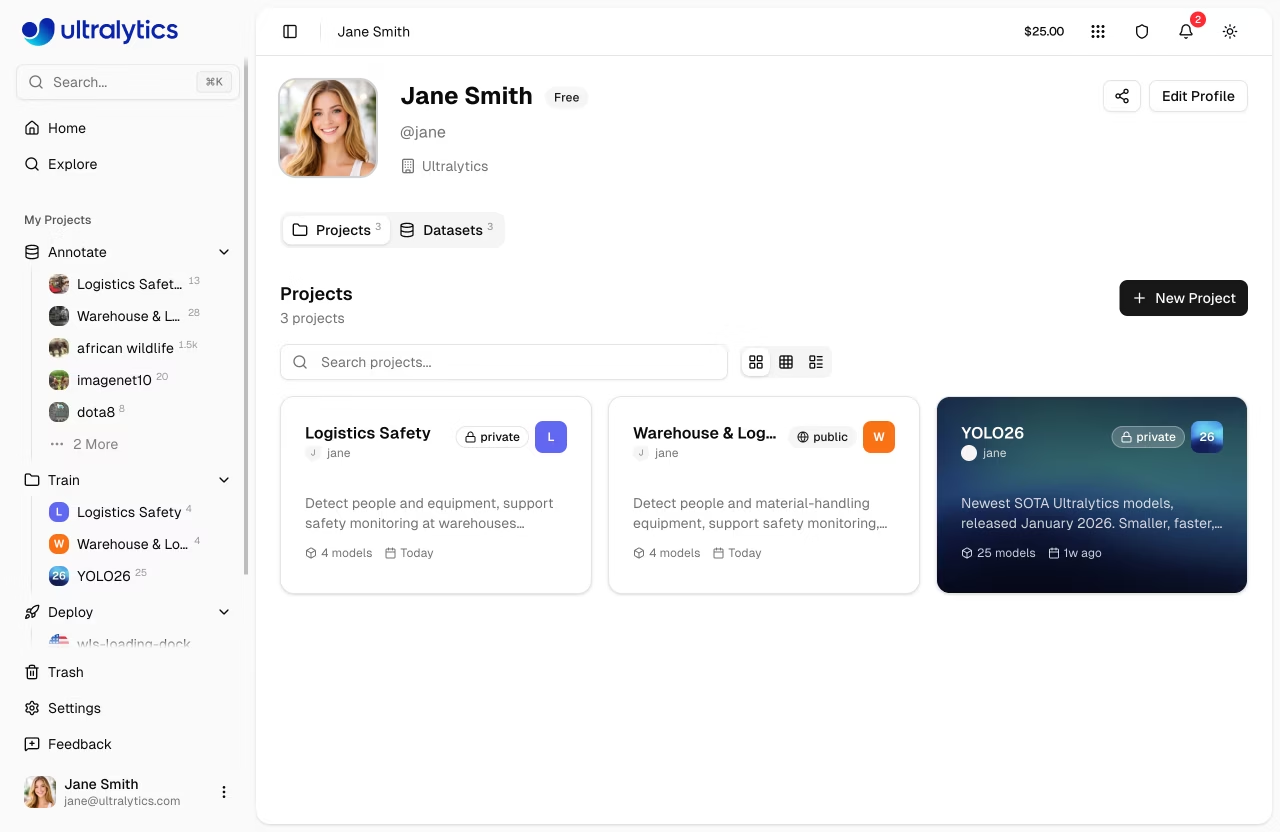
[Ultralytics Platform](https://platform.ultralytics.com) projects provide an effective solution for organizing and managing your models. Group related models together to facilitate easier management, comparison, and development.
|
|
|
|
```mermaid
|
|
graph TB
|
|
P[Project] --> M1[Model 1]
|
|
P --> M2[Model 2]
|
|
P --> M3[Model 3]
|
|
M1 --> C[Charts Dashboard]
|
|
M2 --> C
|
|
M3 --> C
|
|
M1 --> T[Comparison Table]
|
|
M2 --> T
|
|
M3 --> T
|
|
|
|
style P fill:#4CAF50,color:#fff
|
|
style C fill:#2196F3,color:#fff
|
|
style T fill:#FF9800,color:#fff
|
|
```
|
|
|
|
## Create Project
|
|
|
|
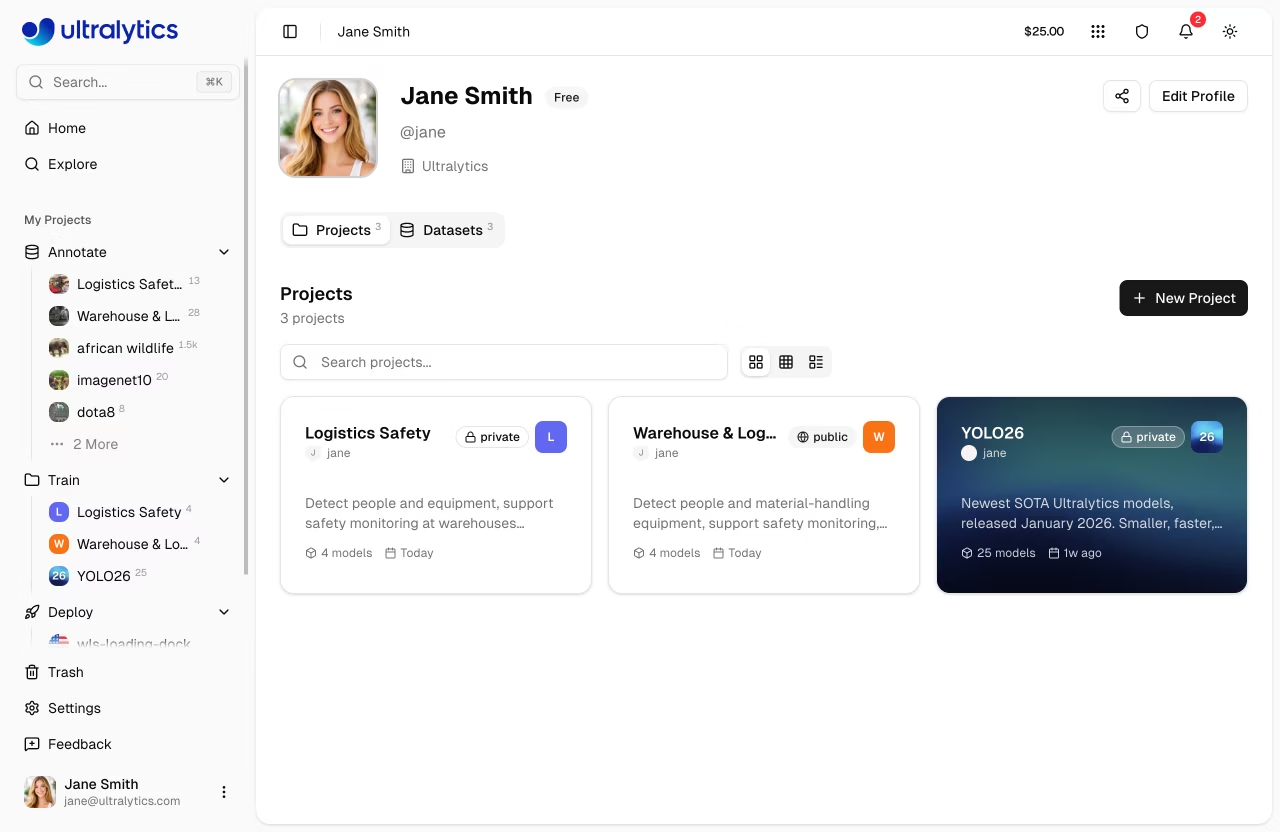
Navigate to **Projects** in the sidebar and click **Create Project**.
|
|
|
|
|
|
|
|
??? tip "Quick Create"
|
|
|
|
You can also create a project from the Home page quick actions.
|
|
|
|
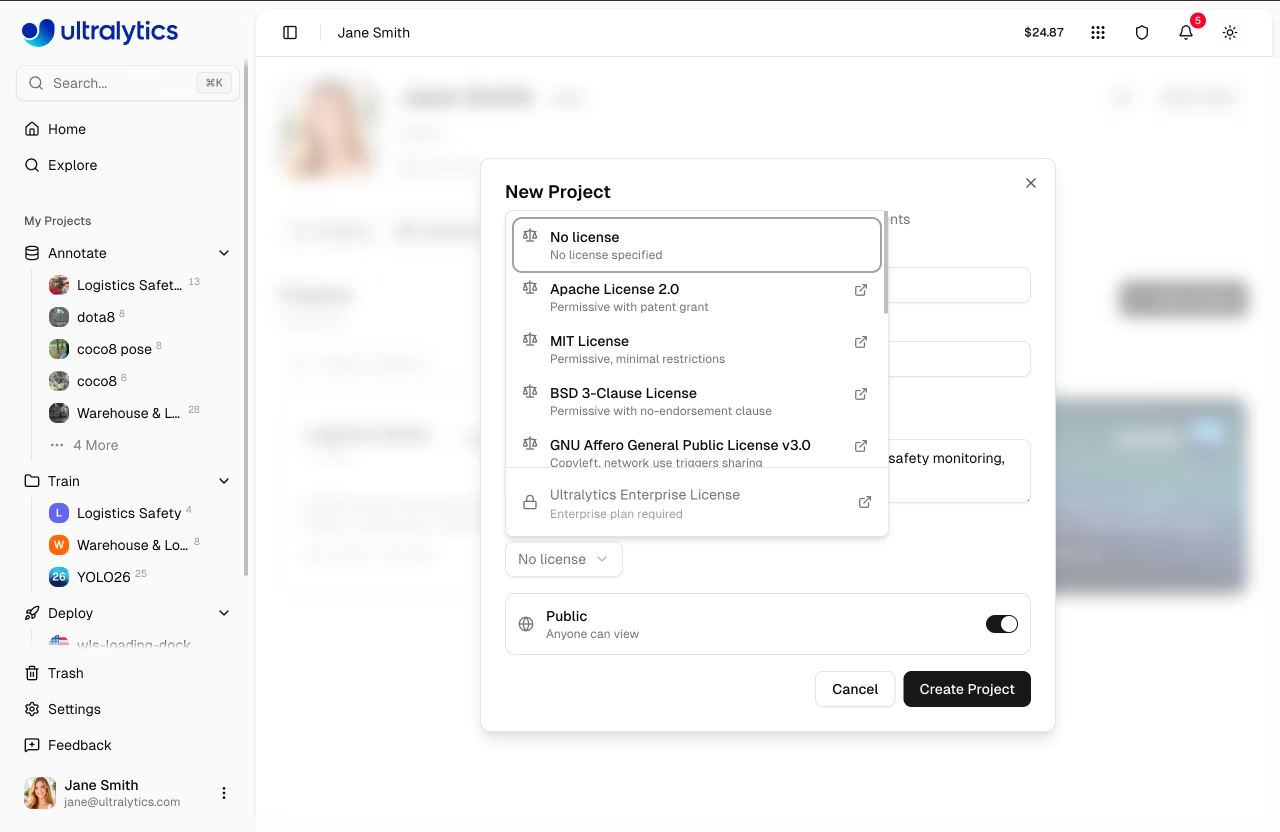
Enter your project details:
|
|
|
|
- **Name**: A descriptive name for your project (a random name is auto-generated)
|
|
- **Description**: Optional notes about the project purpose
|
|
- **Visibility**: Public (anyone can view) or Private (only you can access)
|
|
- **License**: Optional license for your project (AGPL-3.0, Apache-2.0, MIT, GPL-3.0, BSD-3-Clause, LGPL-3.0, MPL-2.0, EUPL-1.1, Unlicense, Ultralytics-Enterprise, and more)
|
|
|
|
|
|
|
|
Click **Create** to finalize. Your new project appears in the Projects list and sidebar.
|
|
|
|
## Project Page
|
|
|
|
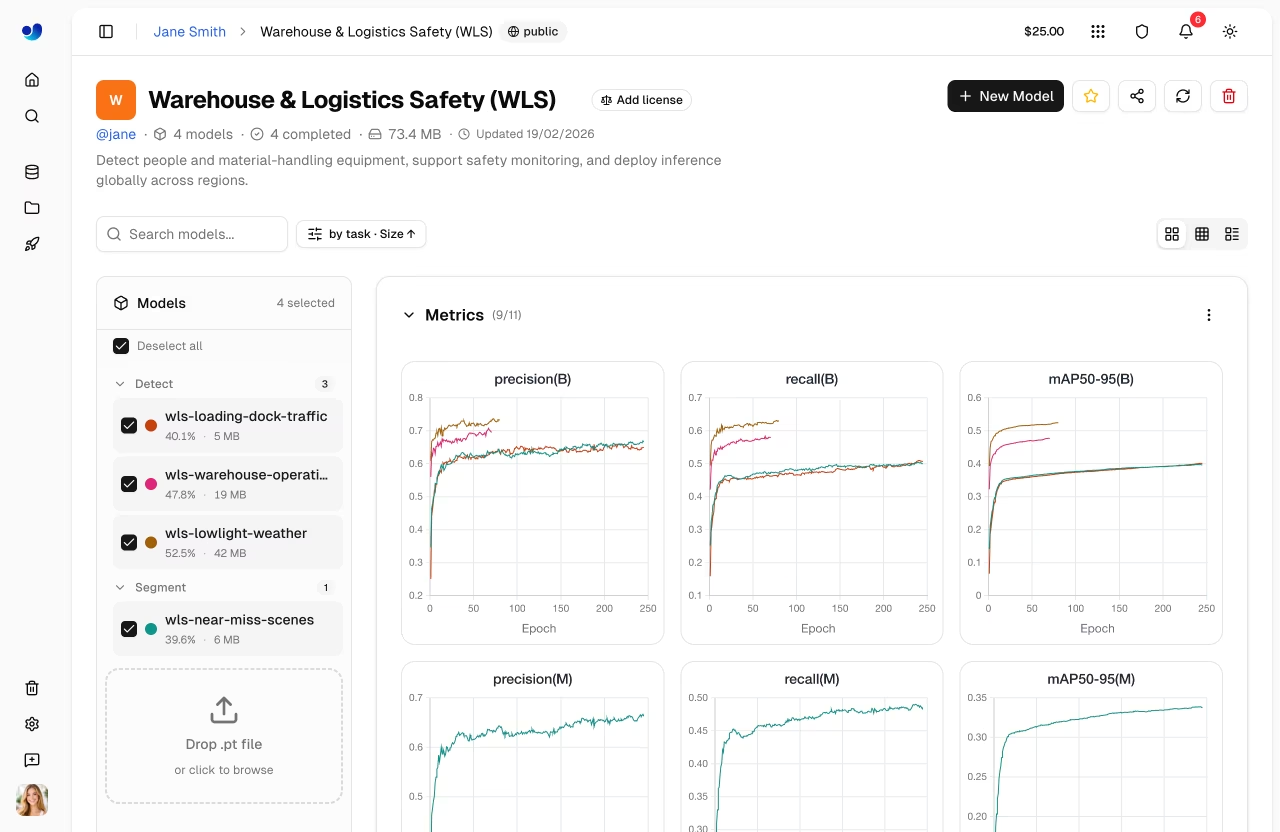
The project page has two main areas:
|
|
|
|
| Area | Description |
|
|
| ------------------ | ------------------------------------------------------------------------------------------------------------------- |
|
|
| **Models Sidebar** | Resizable list of all models in the project with search, status filters, sort options, and checkboxes for selection |
|
|
| **Main Panel** | Charts dashboard or comparison table (toggle between views) |
|
|
|
|
|
|
|
|
### Project Header
|
|
|
|
The header displays:
|
|
|
|
- **Project icon** (customizable color, letter, or uploaded image)
|
|
- **Editable name** (click to rename; slug auto-updates)
|
|
- **License badge**
|
|
- **Model count**, completed/running/failed counts, total size
|
|
- **Clone count** and **last updated** timestamp
|
|
- **Description** (click to edit)
|
|
|
|
Action buttons in the header:
|
|
|
|
| Button | Description |
|
|
| ------------- | ---------------------------------------------- |
|
|
| **New Model** | Opens the [training dialog](cloud-training.md) |
|
|
| **Clone** | Clone project and all models (public projects) |
|
|
| **Star** | Star/unstar the project |
|
|
| **Share** | Social sharing for public projects |
|
|
| **Refresh** | Refresh project data |
|
|
| **Delete** | Move project to trash |
|
|
|
|
### View Modes
|
|
|
|
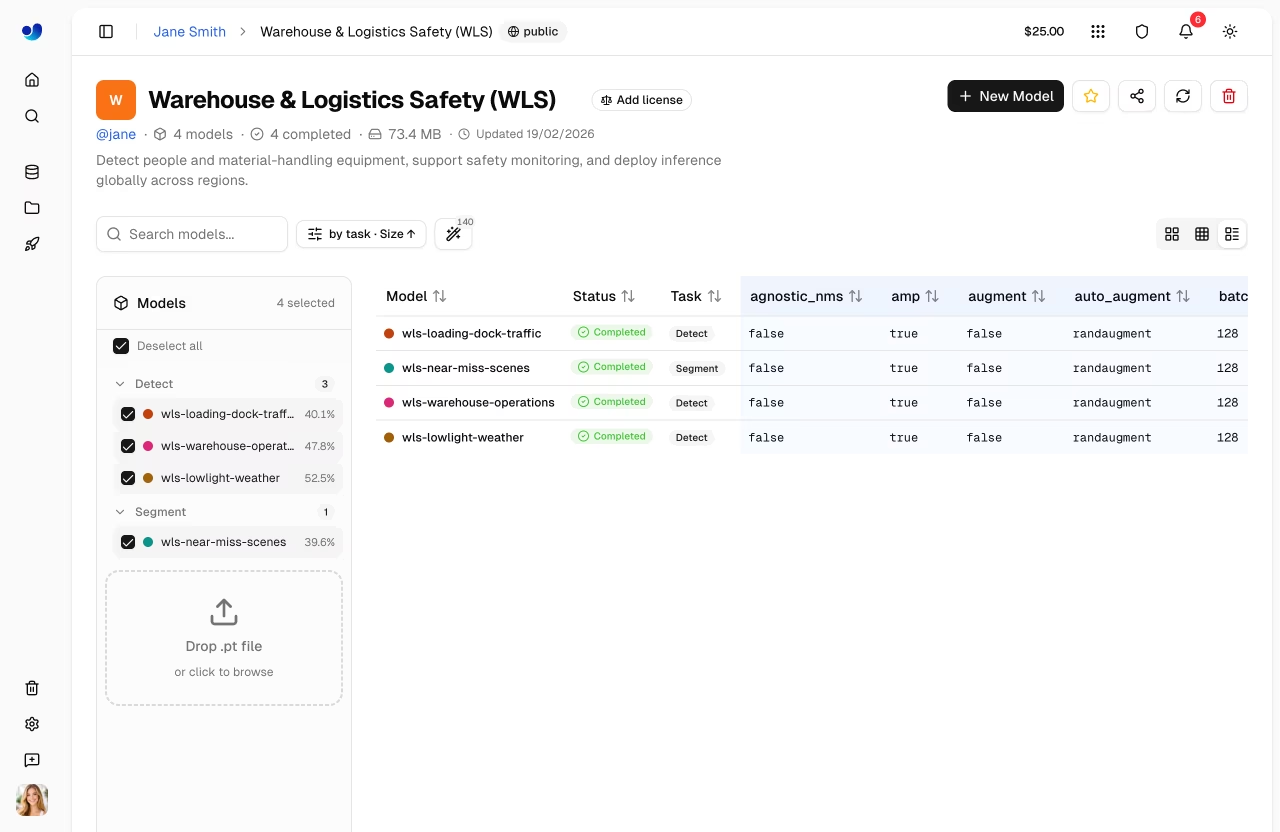
Toggle between two view modes using the view controls:
|
|
|
|
- **Charts view**: Interactive charts dashboard showing loss curves and metric comparisons for selected models
|
|
- **Table view**: Comparison table showing training arguments and final metrics side-by-side with a diff mode to highlight differing columns
|
|
|
|
|
|
|
|
### Models Sidebar
|
|
|
|
The resizable sidebar lists all models in the project:
|
|
|
|
- **Checkboxes** to select which models appear in charts/table
|
|
- **Search** to filter models by name
|
|
- **View options** for status filter (All, Completed, Running, Starting, Pending, Failed, Cancelled), grouping by task, and sort order
|
|
- **Drag and drop** `.pt` files directly onto the sidebar to upload models ([model upload details](models.md#upload-model))
|
|
- **Training progress** shown for running models (epoch count and progress bar)
|
|
|
|
Click any model to open its [model page](models.md).
|
|
|
|
## Project Icon
|
|
|
|
Customize your project icon:
|
|
|
|
1. Click the icon next to the project name
|
|
2. Choose a **color** and **letter**, or upload a custom **image**
|
|
3. Changes save automatically
|
|
|
|
## Visibility Settings
|
|
|
|
Control who can see your project:
|
|
|
|
| Setting | Description |
|
|
| ----------- | ------------------------------------------------ |
|
|
| **Public** | Anyone can view on [Explore](../explore.md) page |
|
|
| **Private** | Only you and collaborators |
|
|
|
|
## Share with Collaborators
|
|
|
|
Share private projects with other users:
|
|
|
|
1. Click the **Share** button on the project page
|
|
2. Enter the collaborator's username or email
|
|
3. Set their role
|
|
4. Click **Invite**
|
|
|
|
Collaborators with editor access can upload models and start training within your project. See [Teams](../account/settings.md#teams-tab) for role permissions.
|
|
|
|
## Clone Project
|
|
|
|
Clone a public project to your own account:
|
|
|
|
1. Visit the public project page
|
|
2. Click **Clone Project**
|
|
3. The project and all its models are copied to your account as a private project
|
|
|
|
!!! info "Clone Behavior"
|
|
|
|
Cloned projects are always created as **private** in your account. The clone count is displayed on the original project. If the original has a copyleft license (e.g., AGPL-3.0), the clone inherits and locks that license.
|
|
|
|
## Compare Models
|
|
|
|
### Charts Dashboard
|
|
|
|
Compare model performance using the charts dashboard:
|
|
|
|
1. Select models in the sidebar using checkboxes
|
|
2. View overlaid metric curves grouped by type (metrics, train loss, validation loss, learning rate)
|
|
3. Drag charts to rearrange, resize by dragging edges
|
|
4. Hover to see exact values, click legend items to hide/show models, click a model line to navigate to that model
|
|
|
|
Available chart groups:
|
|
|
|
| Group | Charts |
|
|
| ----------------- | ---------------------------------------------- |
|
|
| **Metrics** | mAP50, mAP50-95, precision, recall |
|
|
| **Train Loss** | train/box_loss, train/cls_loss, train/dfl_loss |
|
|
| **Val Loss** | val/box_loss, val/cls_loss, val/dfl_loss |
|
|
| **Learning Rate** | lr/pg0, lr/pg1, lr/pg2 |
|
|
|
|
!!! tip "Interactive Charts"
|
|
|
|
- Hover to see exact values
|
|
- Click legend items to hide/show models
|
|
- Drag to zoom into specific regions
|
|
- Click a model line to navigate to that model's page
|
|
- Rearrange and resize charts; layout persists across sessions
|
|
|
|
### Comparison Table
|
|
|
|
Switch to table view for side-by-side comparison of training arguments and final metrics:
|
|
|
|
1. Click the **Table** view mode toggle
|
|
2. See all selected models as rows with training args and metrics as columns
|
|
3. Use the **Diff** button to highlight only columns where values differ across models
|
|
|
|
## Upload Models
|
|
|
|
Upload existing `.pt` model files:
|
|
|
|
1. **Drag and drop** files onto the project page or models sidebar
|
|
2. Multiple files can be uploaded simultaneously (up to 3 concurrent uploads)
|
|
3. Model metadata (task, architecture, class names, training results) is parsed automatically from the `.pt` file
|
|
4. Charts update instantly from locally parsed data while the upload completes in the background
|
|
|
|
!!! example "Supported Files"
|
|
|
|
Only PyTorch `.pt` files from Ultralytics YOLO training are supported. The Platform parses embedded metadata including training results, arguments, task type, and class names. See [Models](models.md) for format details.
|
|
|
|
## Edit Project
|
|
|
|
Update project name, description, or settings:
|
|
|
|
1. Click the project name to edit it inline
|
|
2. Click the description to edit it inline
|
|
3. Click the icon to customize it
|
|
4. Click the license badge to change the license
|
|
|
|
|
|
|
|
## Delete Project
|
|
|
|
Remove a project you no longer need:
|
|
|
|
1. Click the **Delete** button (trash icon) in the header
|
|
2. Confirm deletion
|
|
|
|
!!! warning "Cascading Delete"
|
|
|
|
Deleting a project also deletes all models inside it. This action moves items to [Trash](../account/trash.md) where they can be restored within 30 days.
|
|
|
|
## FAQ
|
|
|
|
### How many models can a project contain?
|
|
|
|
There's no hard limit on models per project. However, for better organization, we recommend:
|
|
|
|
- Group related experiments (same dataset/task)
|
|
- Archive old experiments
|
|
- Use meaningful project names
|
|
|
|
### Can I restore a deleted project?
|
|
|
|
Yes, deleted projects go to Trash and can be restored within 30 days:
|
|
|
|
1. Go to [Settings > Trash](../account/trash.md)
|
|
2. Find the project
|
|
3. Click **Restore**
|
|
|
|
### Can I transfer models between projects?
|
|
|
|
Yes, you can clone a model to a different project using the clone model dialog from the [model page](models.md#clone-model).
|